

What is gear linking?
- Gear linking is a QoL system that got introduced on March 10, 2016 together with Nebula raid and the last wave of the Awakened Heroes.
- Basically, gear linking lets you select one fully-geared ally/MC and link his/her entire equipments to another ungeared allies/MC with the same equipment style (up to 4).
- Due to the fact that this system greatly reduces the time/resources on farming equipments for every ally, it is deemed as the most f2p-friendly feature ever released.
- There are some specific terms that is used in this guide:
Source: the geared ally used to link with other allies.
Leecher(s): the ally or allies that inherit the equipment of a giver.
Slot: available spaces for each set of equipment of one giver. (4 slots)
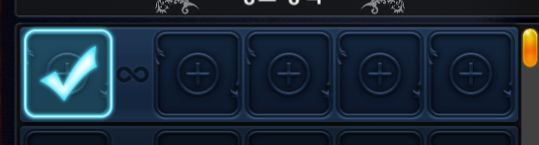
Row: available linking sets (maximum: 10 rows) – at first you’re provided with one free row. You can expand your linking ability by paying 490 rubies per row.
- However, there are important notes (CAUTION! Read this very carefully):
- Gear linking can link your equipment (including weapons, armors AND accessories).
- Gear linking only works between units sharing the same exact style of equipments regardless of classes.
For example, Greysoul cannot link with other rogues that use 2xDaggers for their weapons and thus, can only be linked with Loki.
Another example, Paladin Main Character, who uses 1xSword and 1xShield for his weapons, cannot link with other Paladin Allies since the latter use 1xSword and 1xOrb for their weapons. And thus, he can only link with other Tanks. (ironic right?)- The leechers will receive the same weapon effects/stats/etc as in the giver.
- If your Source has three accessory slots opened and one of the leecher only has one, the effects of only first one accessory will be applied upon the leecher UNTIL HE HAS HIS ACCESSORY SLOTS UNLOCKED.
- Gear Linking only works between Deities (upper SSS-class allies and not normal SSS or any ally in lower tiers).
How do I access gear linking?
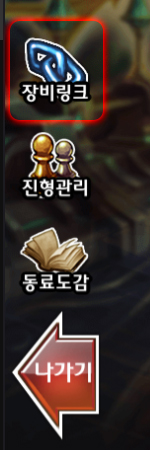
- On your main screen, click Ally Management button:

- Then, click on the chain icon in the middle of the left screen:
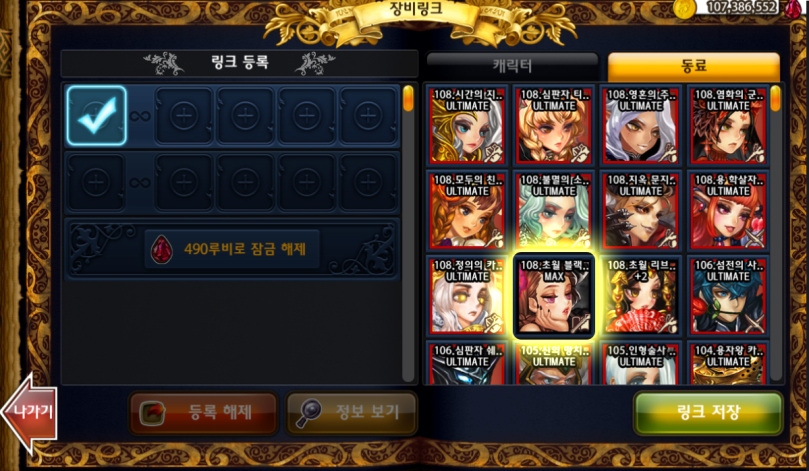
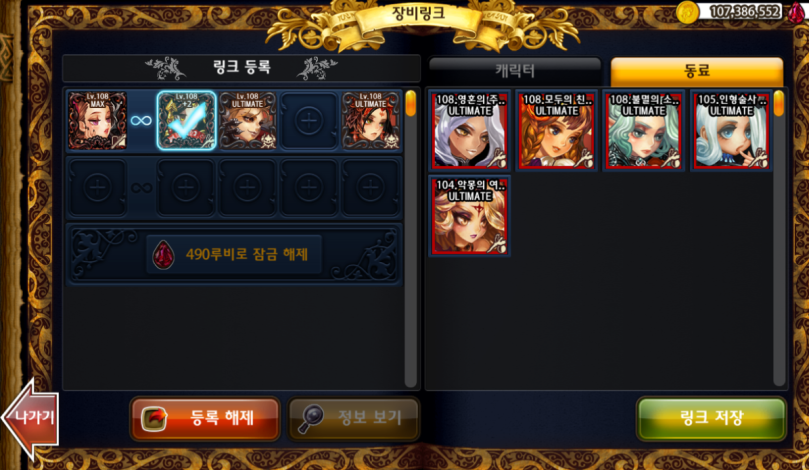
- You’ll be directed to this screen:
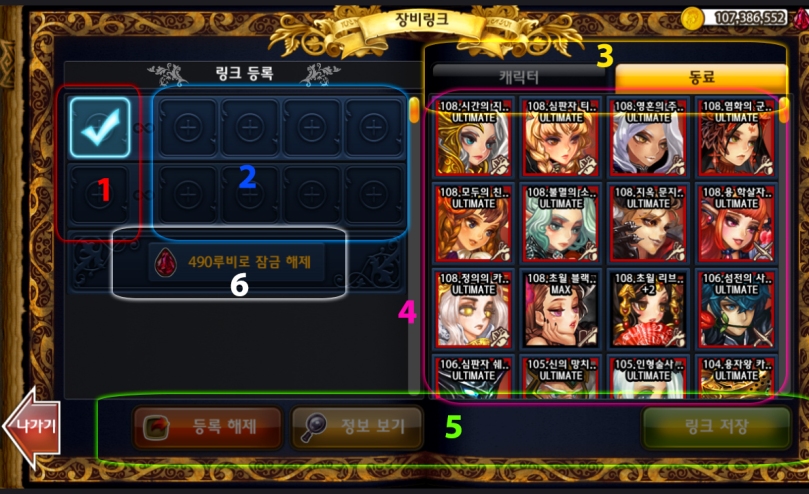
- Now let me first explain this page:
Red zone (1): Source allies.
Blue zone (2): Leecher allies.
Yellow zone (3): consists of two tabs: the first one contains all of your main characters and the second contains your available allies (whom you can use as source/leechers).
Purple zone (4): Listing of current main characters/allies to be used as sources.
Green zone (5):
Buttons duh?consists of three buttons (from right to left): the first one is used to save changes, the second one is used to view details of selected ally, the third one is used to remove an ally from the link chain.White zone (6): is used to buy one more row (set of linking).
Alright, now how do I link gear?
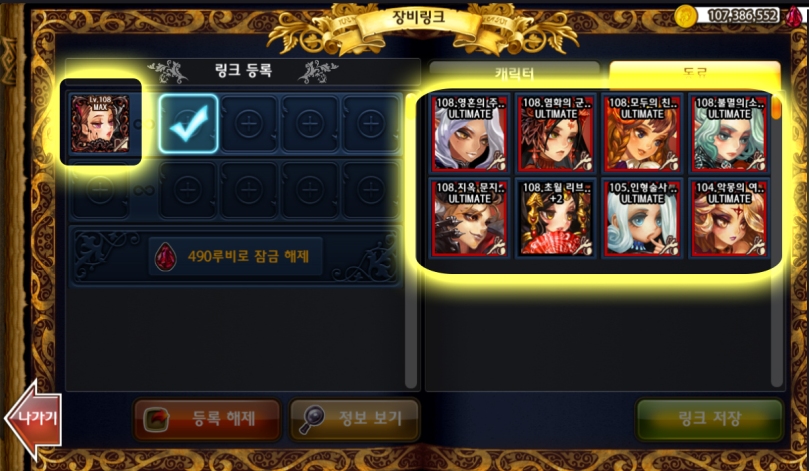
- First, click on one of the empty Source icon like this:
- The page then displays all available allies/main characters on the Purple zone.
- Choose one ally as your source. For example, I’ll choose my Tran. Blackaria as the source:
- Upon clicking T.Blackaria, the listing will be narrowed down to containing units that match T.Blackaria’s equipment style (which is 1xStaff and 1xOrb):
- After that, the blue check mark will automatically jump into the first slot of leechers. Now I will proceed to add 4 leechers to Blackaria’s set by clicking at their icons:
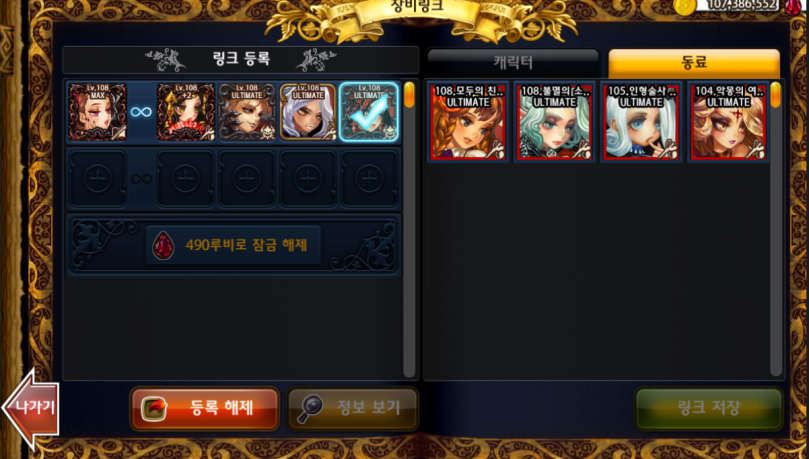
- Now that the proceed is done, I will click the green button to save the set.
- And voila, Trans Ravengale, Yvante, Eirden and Turq now have the same equipment as Trans Blackaria 😀
- If I don’t want any of them to be the leecher anymore, I can simply select their icon and click the red button. For example, I want to remove Eirden from the linking chain:
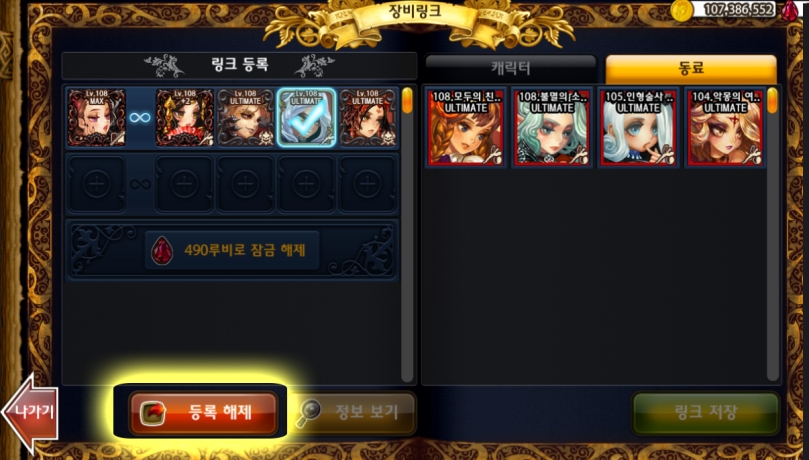
- Eirden will then jump back to the listing on the right and leave the spot open so you can add a different leecher to the link 😛
- That’s basically it for the linking part. Now before ending the guide, let’s examine the unmentioned button: the View details button, which is enabled every time you click on the icon of the Source 😛
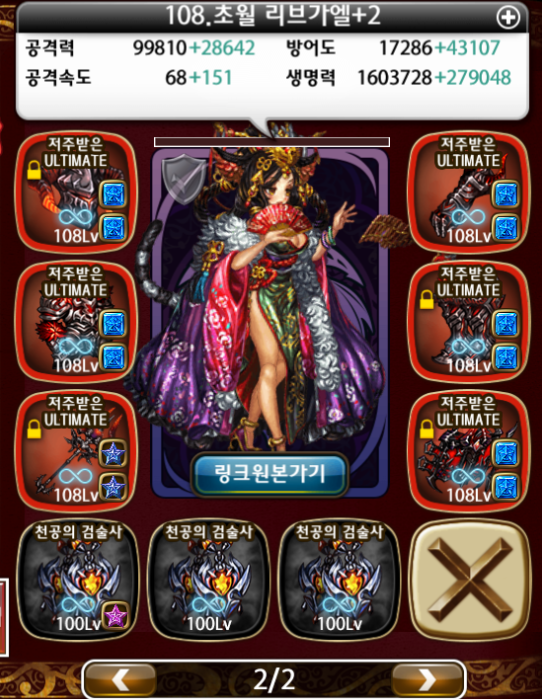
- Let’s view my Source’s details:
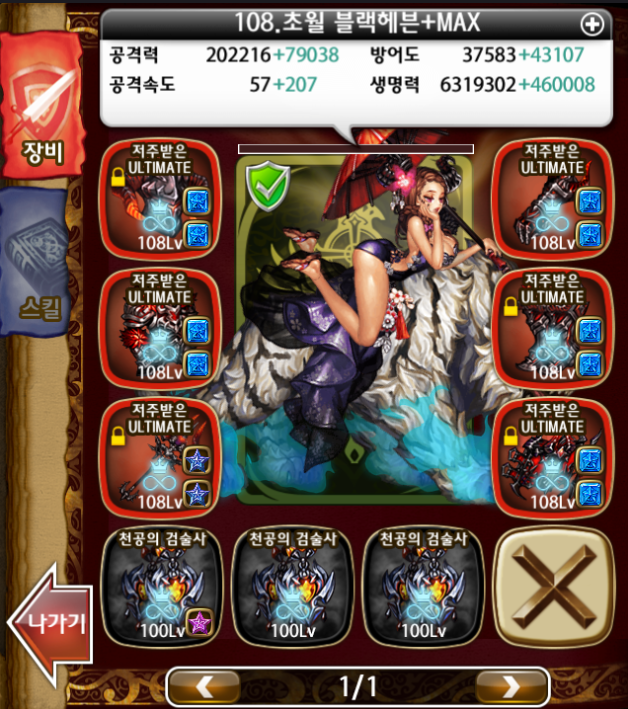
- As you can see, there is this infinity mark with a crown above it on each of the equipment, which marks the Link Source. As for the leechers, the mark looks similar to the Source’s but without the crown:
Well that’s a wrap for Gear Linking 🙂
Enjoy the adventure and don’t forget to comment/contact me for any doubt you have 😀
See you next time!
-Amarantine

Did you make a translation for the gear stats?
LikeLike
not exactly but I got the general stats translated 😛
LikeLike
Jealous of all the dang ultimate SSS 😦 I can’t get past one and have such a hard time getting any more ulted.. I also am not on the Korean version..
LikeLike
Menonton jalannya laga sabung ayam Secara online.
LikeLike